
Presentations
@presentations
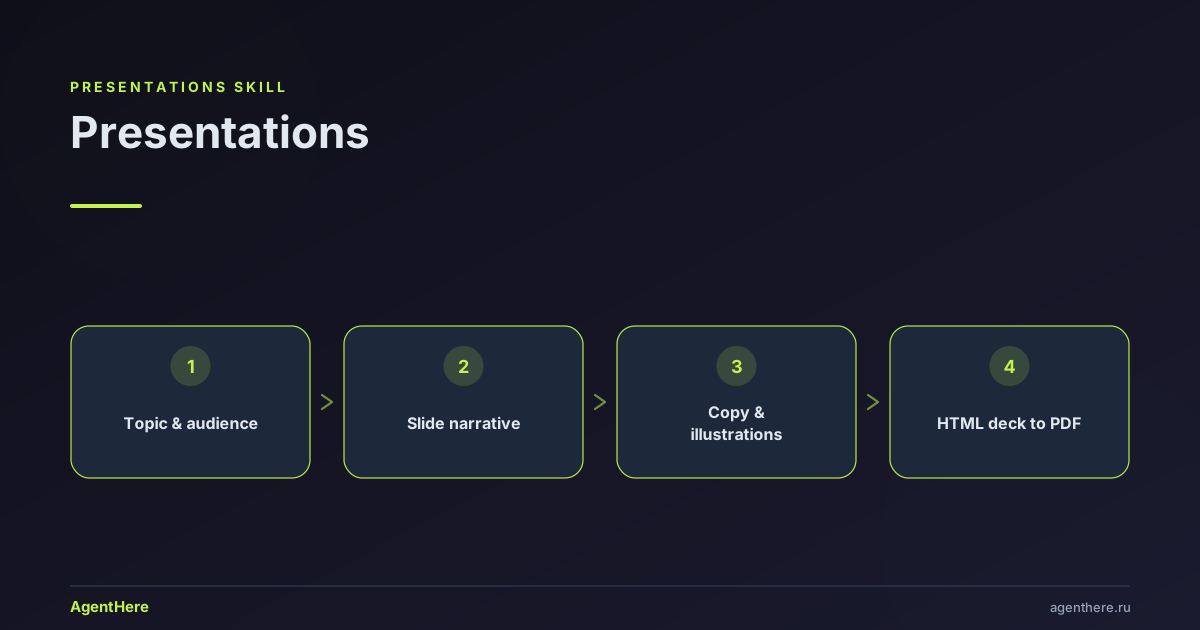
Builds finished presentations from a topic: structures the narrative, writes slide copy, generates illustrations, adds speaker notes, and assembles a browser-ready HTML deck that exports to PDF. Use when the user asks to 'make a presentation', 'prepare slides', or needs a deck for a talk, pitch, lesson, or report.
Who Presentations is for
- Students and grad students — thesis or coursework defense, a talk, a structure built for the committee.
- Startups and founders — an investor pitch, demo day, a product walkthrough.
- Managers and leads — a report, project review, status meeting, quarterly breakdown.
- Teachers and trainers — a lesson, lecture or webinar with a logical narrative arc.
What you get
- An HTML deck (
presentation.html) — a self-contained file that opens with a double-click in any browser (Windows, macOS, Linux). - PDF export — via 'Print' (Ctrl+P → 'Save as PDF'); the deck is already laid out for print.
- A markdown version of the slides — handy for editing copy.
- Speaker notes — what to say under each slide.
How it works: narrative first
The goal picks the arc: a pitch (Problem → Solution → Product → Market → Team → Ask), a report, a lesson, or a defense. The structure is agreed before any text is written. Then it's one slide, one thought: a tight title, 3–5 bullets and a speaker note, with concrete numbers ('+38%', not 'a lot'). Illustrations for the cover and key slides are generated separately, with no text baked into the image — lettering is overlaid afterwards and stays crisp.
Useful details
- Slide format is 16:9, 1280×720; images only where they carry meaning.
- Facts and figures for the topic can be checked before the deck is assembled.
- The skill isn't for editing someone else's .pptx with a complex corporate theme — an exact style match isn't achievable.
Related: writing assistant for the talk script, and the AI Designer agent for visual style.
Ready to build a deck? Describe the topic and audience — launch Presentations.
Is it a finished deck or just bullet points?
A finished deck: a self-contained HTML file with structure, slide copy, speaker notes and illustrations, plus a markdown version — not 'here are the points, finish it yourself'.
How do I open and download it?
Open the presentation.html file in any browser (Windows, macOS, Linux), then Ctrl+P → 'Save as PDF'. The deck is already laid out for the print format.
Does it create illustrations?
Yes. Covers, dividers and key slides get generated images in the deck's flat style, with no text baked in — lettering is overlaid later so it stays sharp.
Does it work for a thesis defense or pitch?
Yes. It picks a narrative arc for the goal — pitch, report, lesson or defense — and agrees the structure before writing any text.
Can it edit someone else's .pptx?
No. Editing an existing .pptx with a complex corporate theme can't match the exact style — better to build fresh.
Is it paid?
It runs on AgentHere's free tier — you only spend tokens. See the pricing page for exact limits.
Презентации
Создаём готовую презентацию — не набор тезисов, а рабочий дек: структура, текст слайдов, иллюстрации, заметки спикера и собранный HTML-файл, который открывается двойным кликом в любом браузере (Windows/macOS/Linux) и экспортируется в PDF через «Печать». Это закрывает запрос «сделать презентацию» целиком — пользователь получает итоговый артефакт, а не «вот вам тезисы, дальше сам».
Когда использовать
- «сделай / сделать презентацию», «подготовь слайды», «презентация для выступления»
- защита (диплом, курсовая, проект), питч, отчёт, урок, лекция, доклад, вебинар, портфолио
- «оформить в виде слайдов» уже готовый текст или документ
- «нейросеть для презентаций» — пользователь ждёт именно готовый результат
Когда НЕ использовать
- Правка существующего
.pptxсо сложной корпоративной темой/брендбуком — точного совпадения стиля не получить. - Дашборды и анализ таблиц как основа — это навык
data-analysis. - Текст выступления без слайдов —
writing-assistant.
Что получается на выходе
- HTML-дек (
presentation.html) — самодостаточный файл, работает офлайн, открывается в браузере. - Markdown-версия — слайды текстом, удобно править.
- Заметки спикера — что говорить под каждый слайд.
- Экспорт в PDF — через «Печать» в браузере (Ctrl+P → «Сохранить как PDF»); дек уже свёрстан под печатный формат.
Инструменты
| Задача | Инструмент |
|---|---|
| Иллюстрации, обложки, разделители | MCP kling_text_to_image (фоллбэк — glm_generate_image) |
| Проверить факты и цифры по теме | MCP web_search, web_reader |
| Собрать HTML-дек | Node-хелпер scripts/build-deck.js (Node вшит в приложение — работает на Windows) |
| Сохранить файлы | встроенные write / edit |
MCP-инструменты серверные и кросс-платформенные, Node гарантированно доступен (Electron). Никаких bash/curl/ffmpeg — это работает на Windows.
Рабочий процесс
Шаг 1. Уточнить (по одному вопросу)
Минимум — пять пунктов: тема, аудитория, цель, длина (число слайдов), стиль/тон. Не начинайте структуру, пока это не ясно.
Шаг 2. Нарратив
Выберите дугу под цель и предложите пользователю структуру (заголовки слайдов) до того, как писать текст:
- Питч / продажа: Проблема → Решение → Продукт → Рынок → Трекшн → Команда → Аск.
- Доклад / отчёт: Контекст → Что сделали → Результаты (цифры) → Выводы → Что дальше.
- Урок / лекция: Зачем → Понятие → Пример → Проверка → Итог.
- Защита (диплом/проект): Актуальность → Цель → Метод → Результат → Значимость.
Шаг 3. Содержание слайдов
Один слайд — одна мысль. Для каждого: заголовок + 3–5 тезисей + заметка спикера. Правила:
- Тезисы короткие, глагольные, считываемые за ~3 секунды.
- Цифры конкретные: не «много», а «+38%».
- Без простыни текста; детали уходят в заметки спикера и устную речь.
Шаг 4. Иллюстрации
Для обложки, разделителей и ключевых слайдов вызывайте kling_text_to_image (фоллбэк — glm_generate_image). Промпт — в стиле деки: плоско, минималистично, 2–3 цвета, без текста на картинке (текст добавится в HTML). Соотношение — 16:9 под слайд. Не генерируйте картинки на каждый слайд — только там, где они несут смысл.
Шаг 5. Сборка деки
- Соберите спецификацию в JSON (схема ниже).
- Сохраните её в
slides.jsonинструментомwrite. - Запустите хелпер:
node scripts/build-deck.js --input slides.json --out presentation.html. - Откройте
presentation.html, проверьте; при правках — меняйте JSON и пересобирайте.
Если файла scripts/build-deck.js нет — создайте его из исходника в секции «Исходник хелпера» ниже.
Шаг 6. Доставка
Отдайте пользователю путь к presentation.html, markdown-версию и краткую инструкцию по экспорту в PDF. Предложите подправить тон, длину, визуал.
Спецификация JSON
{
  "title": "Название презентации",
  "author": "Автор",
  "theme": "light",
  "ratio": "16:9",
  "slides": [
    { "title": "Заголовок слайда", "bullets": ["тезис 1", "тезис 2"], "image": "https://...", "notes": "что говорить" }
  ]
}
Антипаттерны
- Слайд-простыня: 10 тезисов мелким шрифтом → разбейте на 2–3 слайда.
- Картинка ради картинки → только несущая смысл.
- Цифры без источника → проверяйте через
web_searchи указывайте источник/дату. - Не согласовали структуру → не начинайте писать слайды.
Исходник хелпера
Ниже — полный исходник scripts/build-deck.js. Файл уже поставляется вместе с навыком; этот блок нужен, чтобы пересоздать его, если файл отсутствует. Держите копии синхронно при правках.
#!/usr/bin/env node
"use strict";
// build-deck.js — assemble a self-contained HTML slide deck from a JSON spec.
// Cross-platform Node, NO external dependencies. Windows-safe (Node is bundled).
// node scripts/build-deck.js --input slides.json --out presentation.html
// cat slides.json | node scripts/build-deck.js > presentation.html
const fs = require("fs");
function parseArgs(argv) {
const args = { input: null, out: null };
for (let i = 2; i < argv.length; i++) {
const a = argv[i];
if (a === "--input" || a === "-i") args.input = argv[++i];
else if (a === "--out" || a === "-o") args.out = argv[++i];
else if (a === "-h" || a === "--help") args.help = true;
}
return args;
}
function readStdinSync() { return fs.readFileSync(0, "utf-8"); }
function esc(s) {
return String(s == null ? "" : s).replace(/&/g, "&").replace(/</g, "<")
.replace(/>/g, ">").replace(/"/g, """);
}
function dimFor(ratio) { return ratio === "4:3" ? { w: 1024, h: 768 } : { w: 1280, h: 720 }; }
function render(spec) {
const title = spec.title || "Презентация";
const author = spec.author || "";
const dark = spec.theme === "dark";
const { w, h } = dimFor(spec.ratio);
const slides = Array.isArray(spec.slides) ? spec.slides : [];
const bg = dark ? "#0f1115" : "#ffffff", fg = dark ? "#f4f6fb" : "#16181d";
const muted = dark ? "#aab2c5" : "#5b6473", accent = "#3b82f6";
const border = dark ? "#222633" : "#e6e8ee", dash = dark ? "#2a2f3d" : "#e0e3ea";
const slidesHtml = slides.map((s, i) => {
const img = s.image ? `<img class="slide-img" src="${esc(s.image)}" alt="">` : "";
const bullets = Array.isArray(s.bullets) && s.bullets.length
? `<ul class="bullets">${s.bullets.map((b) => `<li>${esc(b)}</li>`).join("")}</ul>` : "";
const notes = s.notes ? `<aside class="notes"><strong>Заметки:</strong> ${esc(s.notes)}</aside>` : "";
return `<section class="slide"><div class="slide-body"><h2 class="slide-title">${esc(s.title || "")}</h2>${bullets}${img}</div><div class="slide-foot">${i + 1} / ${slides.length}</div>${notes}</section>`;
}).join("\n");
return `<!DOCTYPE html><html lang="ru"><head><meta charset="utf-8"><meta name="viewport" content="width=device-width, initial-scale=1"><title>${esc(title)}</title>
<style>
*{box-sizing:border-box}body{margin:0;background:${bg};color:${fg};font-family:-apple-system,"Segoe UI",Roboto,"Helvetica Neue",Arial,sans-serif}
.deck{display:flex;flex-direction:column;align-items:center;gap:24px;padding:24px}
.meta{text-align:center;color:${muted};padding:8px 0 24px}.meta h1{color:${fg};font-size:34px;margin:0 0 6px}
.slide{position:relative;width:${w}px;height:${h}px;padding:56px 64px;background:${bg};color:${fg};border:1px solid ${border};border-radius:12px;box-shadow:0 6px 24px rgba(0,0,0,.08);overflow:hidden;display:flex;flex-direction:column}
.slide-body{flex:1;display:flex;flex-direction:column;justify-content:center}
.slide-title{font-size:36px;line-height:1.2;margin:0 0 20px;color:${fg}}
.bullets{font-size:24px;line-height:1.5;margin:0;padding-left:28px}.bullets li{margin:8px 0}.bullets li::marker{color:${accent}}
.slide-img{max-width:100%;max-height:420px;object-fit:contain;margin-top:16px;border-radius:8px}
.slide-foot{position:absolute;bottom:20px;right:28px;color:${muted};font-size:14px}
.notes{color:${muted};font-size:15px;border-top:1px dashed ${dash};padding-top:10px;margin-top:10px}
@media print{body{background:#fff}.deck{gap:0;padding:0}.meta{padding:0 0 12px}.slide{page-break-after:always;break-after:page;border:0;border-radius:0;box-shadow:none;width:${w}px;height:${h}px}}
</style></head><body><div class="deck"><header class="meta"><h1>${esc(title)}</h1>${author ? `<div>${esc(author)}</div>` : ""}<div style="font-size:13px;margin-top:6px">Собрано в AgentHere · ${slides.length} слайд(ов)</div></header>
${slidesHtml}
</div></body></html>`;
}
function main() {
const args = parseArgs(process.argv);
if (args.help) { process.stderr.write('Usage: node build-deck.js --input slides.json --out presentation.html\n'); process.exit(0); }
let raw;
try { raw = args.input ? fs.readFileSync(args.input, "utf-8") : readStdinSync(); }
catch (e) { process.stderr.write("Ошибка чтения входа: " + e.message + "\n"); process.exit(1); }
let spec;
try { spec = JSON.parse(raw); }
catch (e) { process.stderr.write("JSON некорректен: " + e.message + "\n"); process.exit(2); }
const html = render(spec);
if (args.out) { fs.writeFileSync(args.out, html, "utf-8"); console.error("Готово: " + args.out); }
else { process.stdout.write(html); }
}
main();